✨ TODAY ✨, we’re drilling down on one of the design features of the swan shawl.
Since the design is somewhat advanced, I thought it would be useful to examine one of the design features in more detail. That way, we can understand what makes it look a certain way. Maybe I can even use it in one of my own designs (someday…)
Let’s get started!
Textured Slant
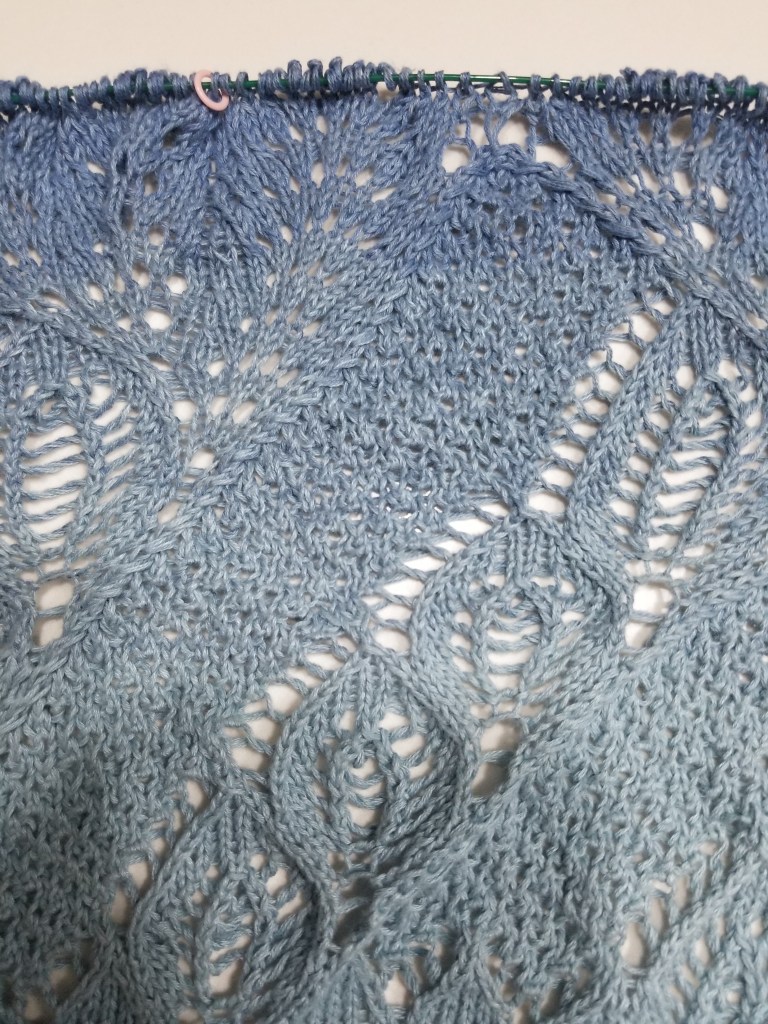
Here’s a section of the shawl including the pattern in question:
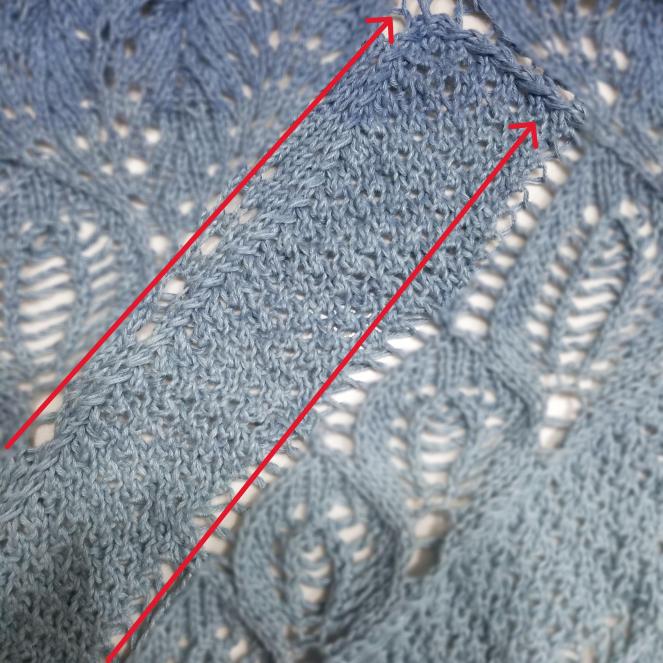
Now this is the specific part I want to talk about:

Notice the following:
- Border on left-side, of a right-slanting sequence of stitches
- Main body containing a filler texture, visually similar to moss stitch
The Pattern
Here’s the chart (taken from the pattern), which produces that textured slant:
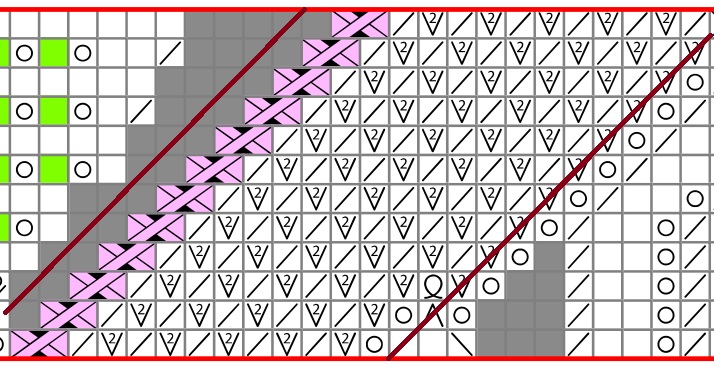
Stitch Key
These are the stitches of import:

- Cable 1 st rightward over 2 sts
- BUT instead of k’ing the 2 underlying sts individually, k2tog them
- Result is a single-strand cable moving rightward, with a simultaneous decrease of 1 st (3 → 2).

- Knit 1 into next st, but don’t drop the knit st yet
- Purl 1 into the same st, and then drop the previous st
- Result is a increase of 1 st

- Knit next 2 sts together, producing 1 new st
- Result is a right-slanting decrease of 1 st
How It Works
Now… let’s talk about how this combination of stitches produces what we saw above 🤔
Here’s the textured slant section again:
Slanted Border (on left)
The left border of the section is something similar to a single-strand cable moving rightward.
Here’s the stitch again:

Here’s a better picture of what’s happening:
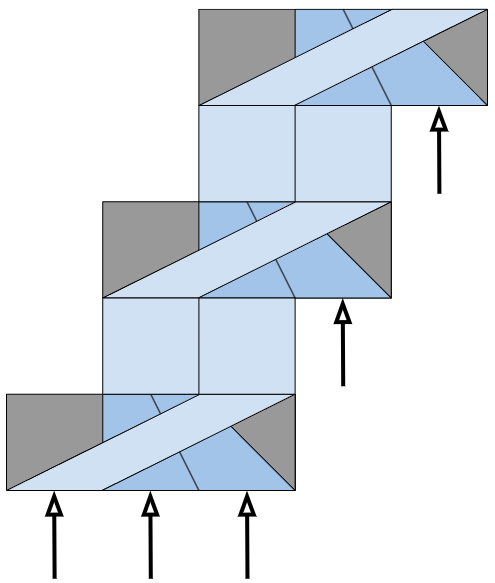
This cable causes a decrease of 1 stitch, so we start with 3 sts and end with 2. Of the starting 3, the left-most “hops” all the way right, over the other 2. The other 2 get knit together and scrunched into the center. So the left-most disappears, making the cable have an overall rightward slant.
Since this pattern continues, and we’ve decreased 1 of the original 3 stitches, we need a new stitch. So the next stitch to the right of the cable gets “eaten” and used to continue the cable’s rightward “hop”. The result is a nice rightward slanting border.
Main Texture
To the right of the border is the main body of the texture.
The stitch combination produces a “busy” effect similar to that of the moss stitch, where there are horizontal and vertical clashing to produce a sort of repeated chaos.
This is achieved by alternating the following two stitches:


- The stitch count balances out by alternating these two:
- Increase by 1 st using KP
- Decrease by 1 st using k2tog
- The characteristic V shape or the KP’s knit st produces slanted lines
- The purled part of the KP inserts a horizontal bar, adding to the texture
- The k2tog also produces adjacent slants
On top of that, the pattern of repeated [KP, k2tog] is continually “walking” rightwards, as the aforementioned slanted border keeps “eating” stitches and thus pushing everything to the right. This adds an alternating aspect to the texture, since the stitches in a single column are forced to alternate, which is similar to how the moss stitch works.
Final Thoughts
I haven’t seen a cable like the one above, where it “eats” stitches and steadily walks in one direction. It definitely produces a nice effect, so I’ll keep that in mind for the future. Also, the body of the texture is pretty straightforward once you get used to those stitches, but it shows that simply alternating a couple of different-looking stitches can easily result in a visually-interesting and “busy” filler texture.
Anyway, I’m close to finishing the shawl, so I’ll report back soon on that 😊
