Here’s one last retrospective post on the 🦢 Wild Swan Shawl 🦢 pattern I just completed!
One of the major visual motifs in the pattern is the reoccurring “feather” seen here:
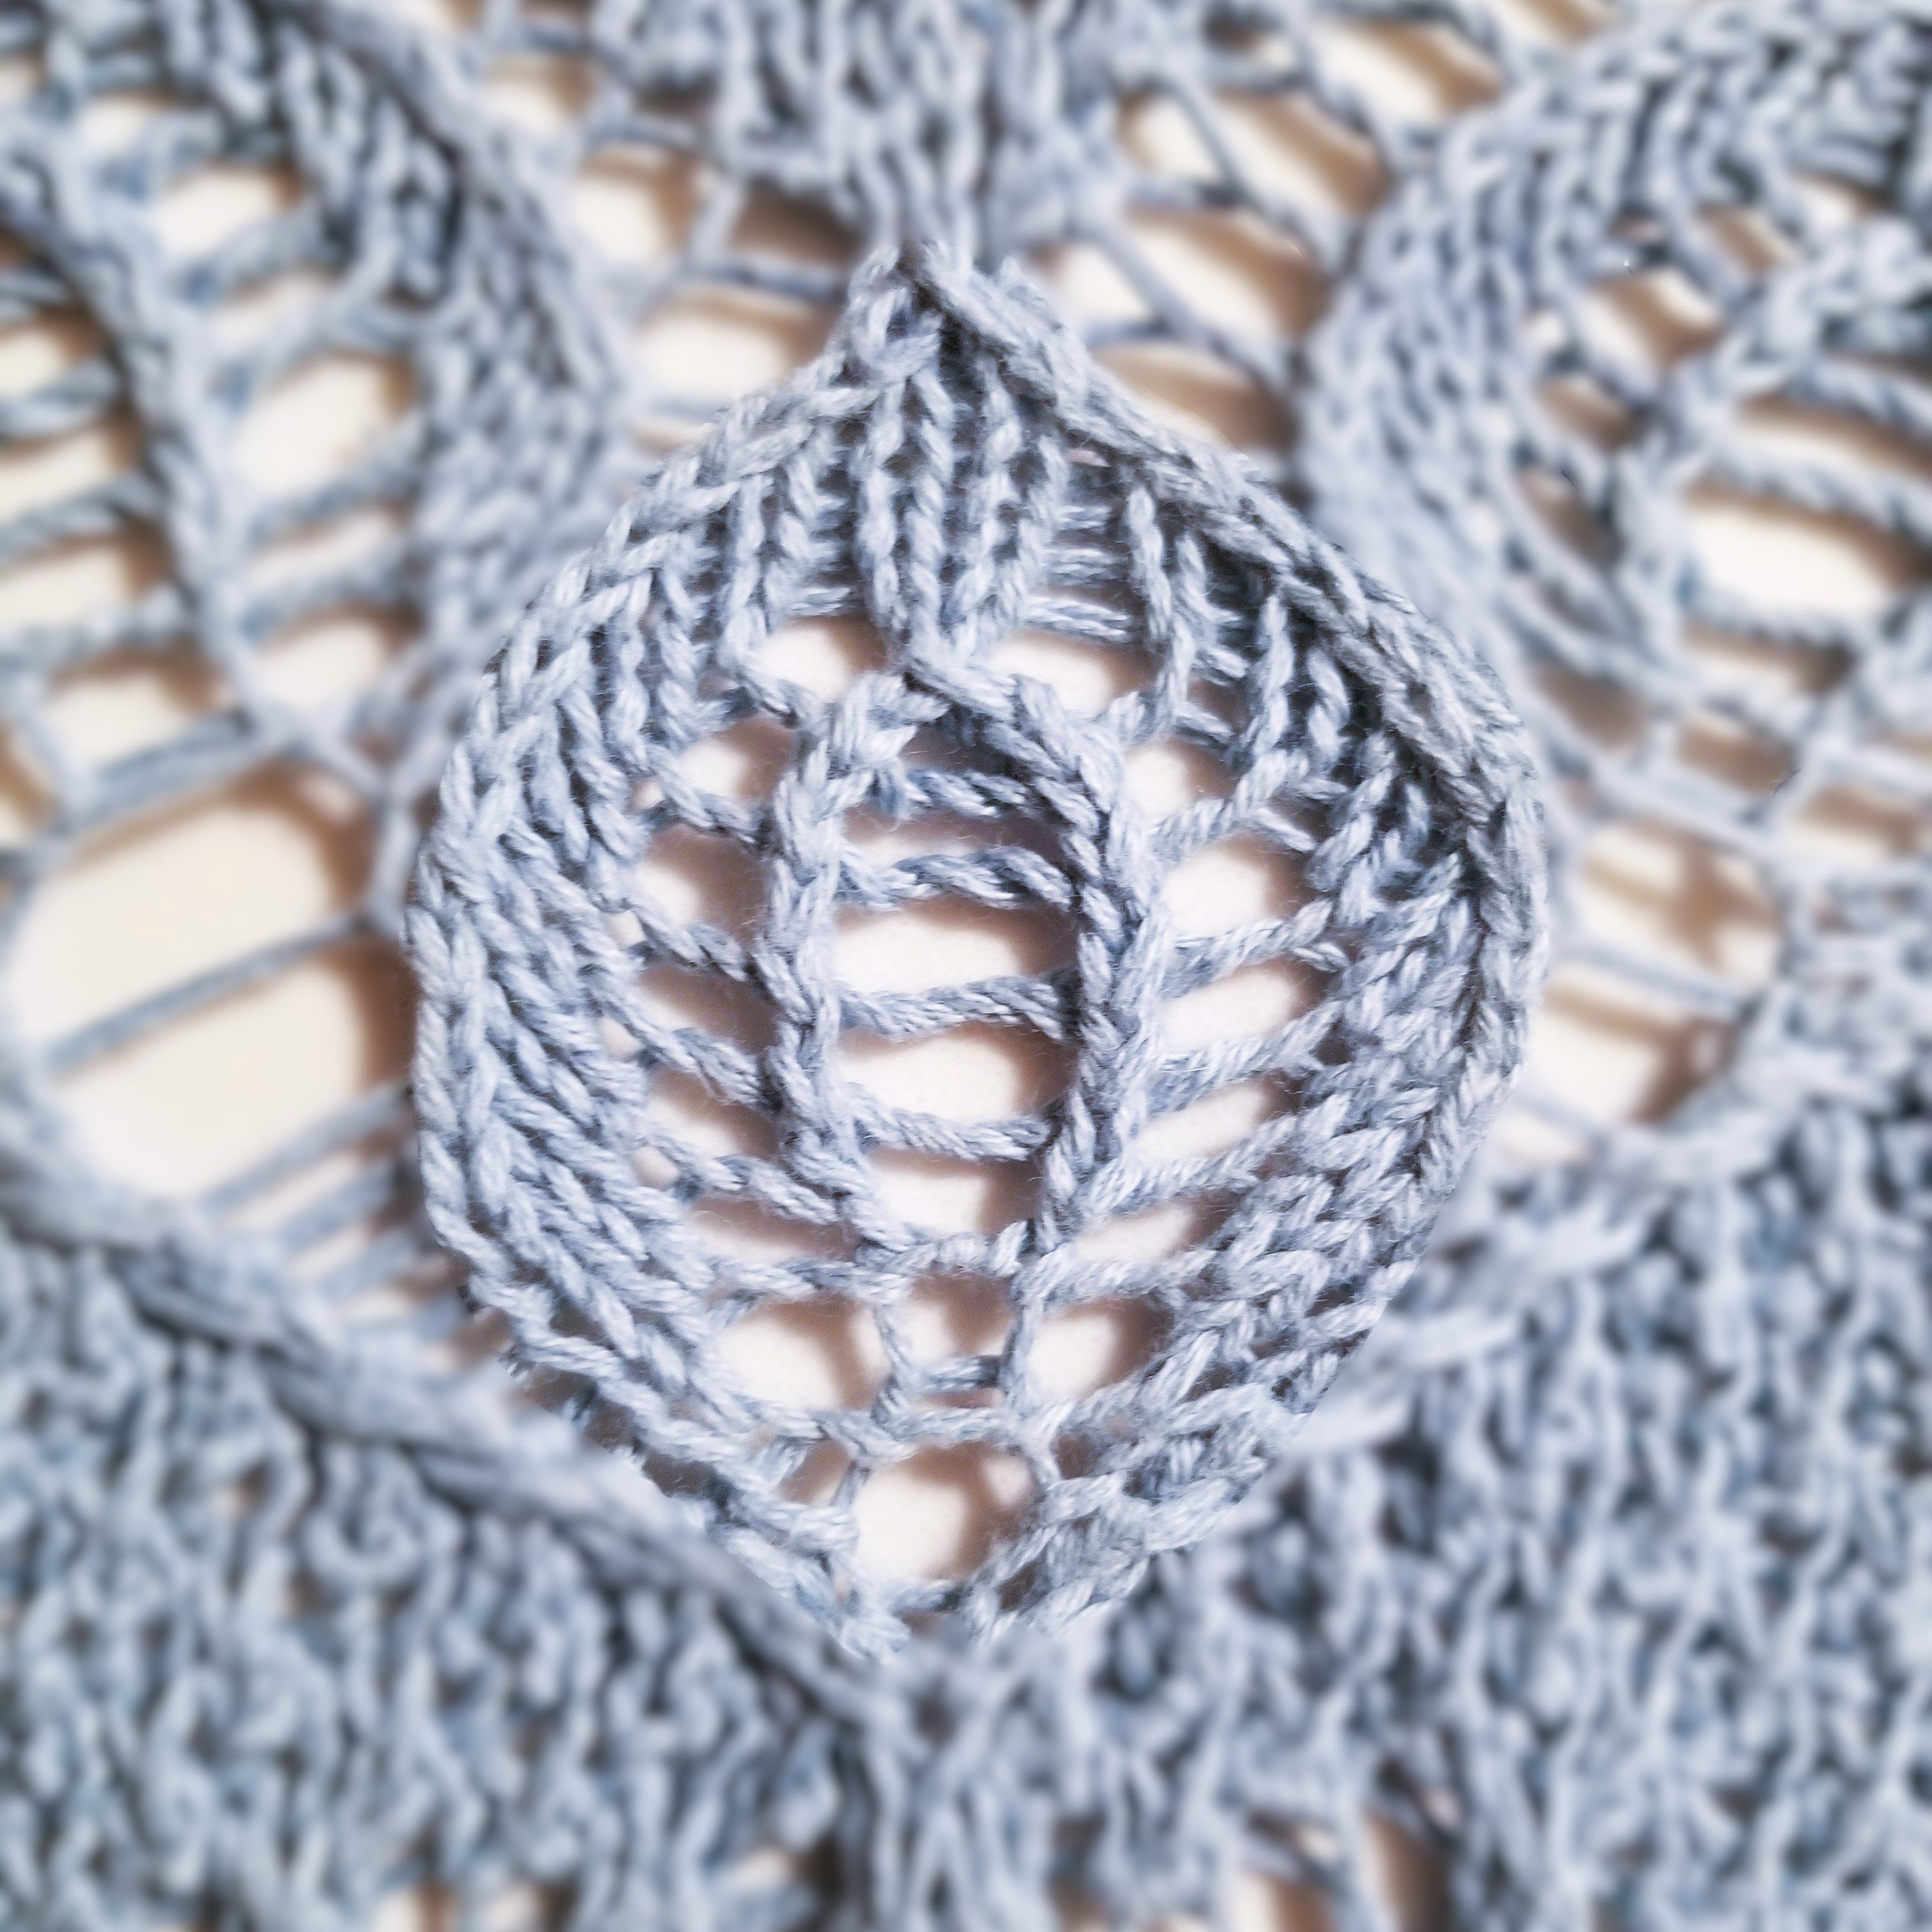
Let’s pick apart the individual stitches that make this pattern so striking and picturesque!
Hard Lines
There are two places where we see a hard border, which creates the outline and shape of the feather:
- Outside shape of the feather
- Inner section at the center
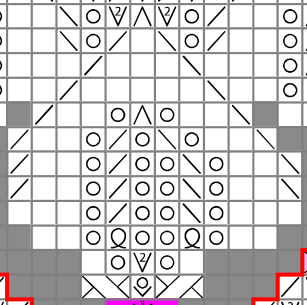
Both of these are created using decreases (k2tog and skp).
Knitting 2 stitches into 1 creates a line which is distinctly heavier than the surrounding stitches.
Also, we see that the direction of those decreases is towards the center of the feather.
This creates the desired curvature of the feather’s outline as the stitches lean in the desired direction.
And finally the feather is “closed” at the top by a double-decrease (sk2p) which collapses the left and right borders into a single stitch, creating the “point” at the top of the feather. Note that this same “closing” stitch is used to complete the inner section in the same way.
Inner Gaps
Yarn-overs are used here to great effect, as they provide a looser “hollow” texture to the inside of the feather.
Since decreases were used to created the hard lines, as mentioned above, there is, of course, a need for increases to prevent the feather from shrinking after every row. The specific choice of yarn-overs, as opposed to another less “holey” increase, creates the holes inside the feather and produces a notable internal pattern, rather than a simpler “filled-in” texture. Specifically in the inner “mini-feather”, the use of double yarn-overs makes the center feel very open and airy, as there is a larger gap between the two decreases.
The double yarn-over in the center is directly adjacent to the surrounding decreases, so the inner section is “self-contained in that sense. The increases are done immediately next to the decreases, so the rest of the feather is unaffected.
Outward Flare
Note that there are also yarn-overs happening just outside of the “mini-feather”. These yarn-overs are increases intended to balance the decreases forming the outline of the overall feather.
Since these yarn-overs happen away from the outline decreases, the knit stitches in-between have a distinct slant towards the outline of the feather. This is because the outline decreases are “eating” the knit stitches, pulling the knit stitches towards them, causing an outward “flare”. The new stitches that replace the “eaten” ones are produced in the center, which further accentuates the inner “mini-feather”, as the hard inner lines are boldened by the yarnover gaps on either side of them.
Major Takeaways
Reflecting on the construction of the feather, I can imagine using the same idea to produce any other self-contained shape as desired. Just use those decreases (k2tog and skp/ssk) to form a hard outer border. Perhaps also use them to make lines inside the shape. Then just supplement those with increases to balance the decreases. Yarn-overs can be used as the increases to produce holes and add texture.
I shall keep this in mind in the future… Thank you for the lesson, Swan Shawl 🤝
