Crafting Projects · Shawls

Swan Shawl [Part 1] – Halfway Point

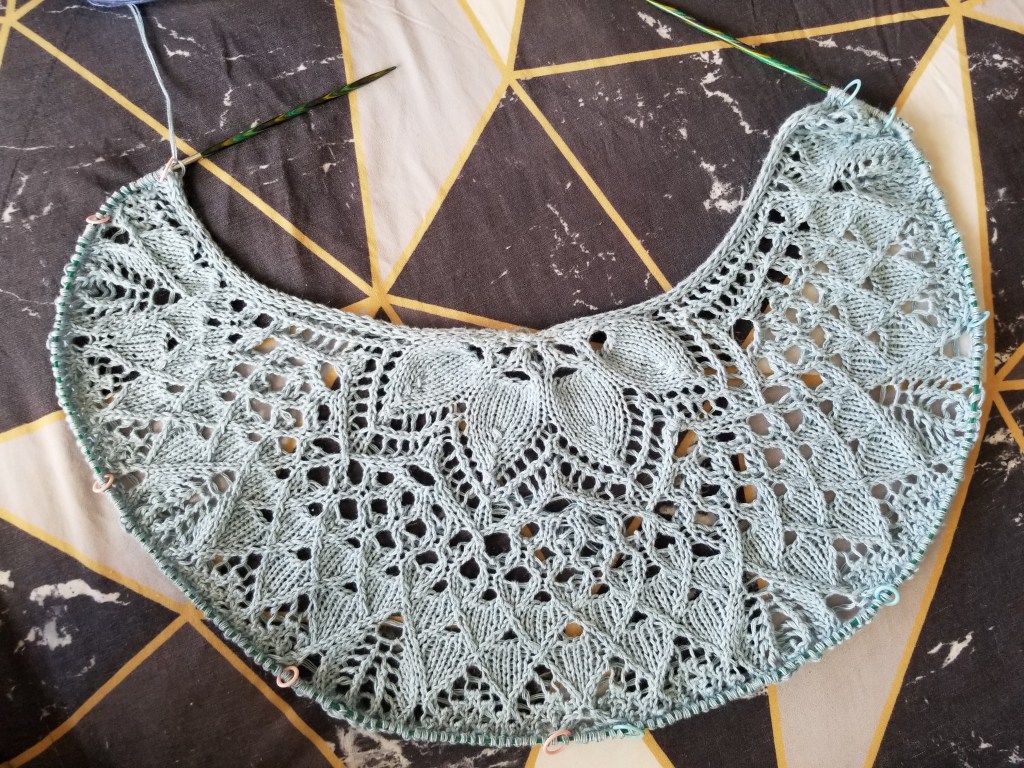
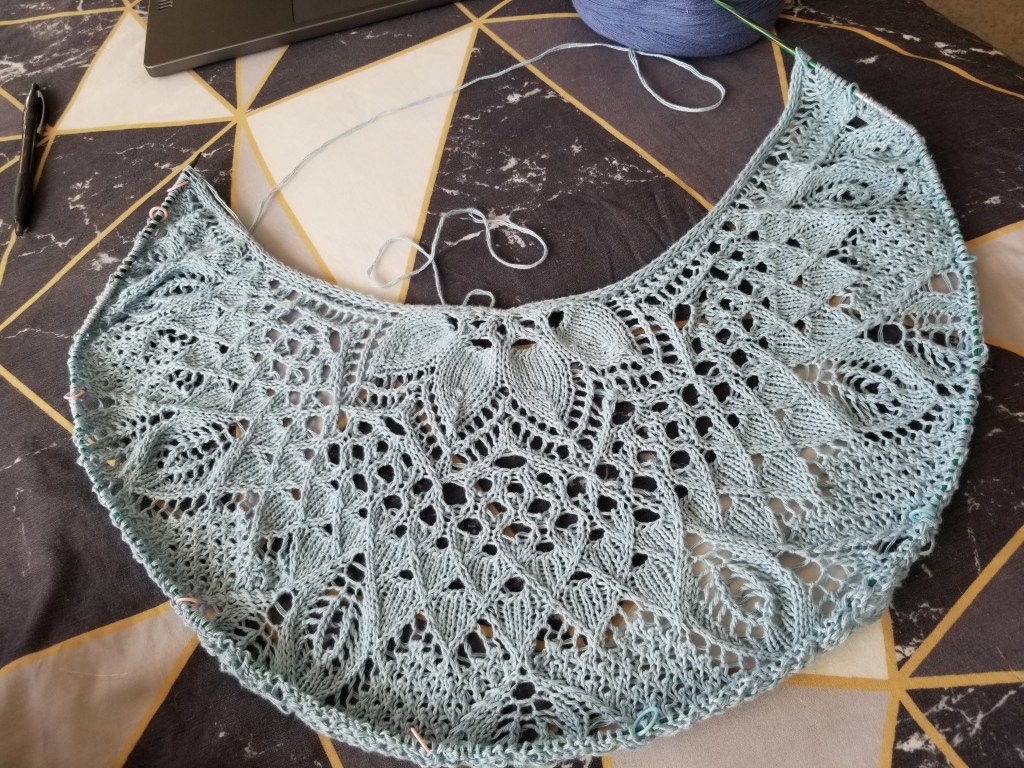
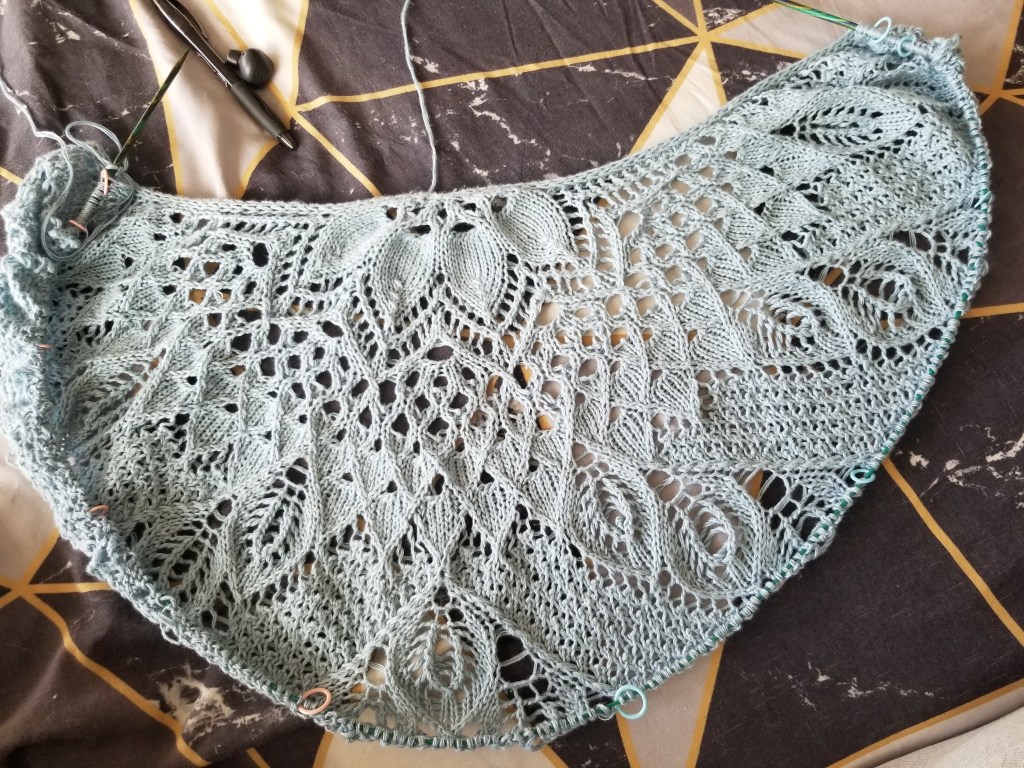
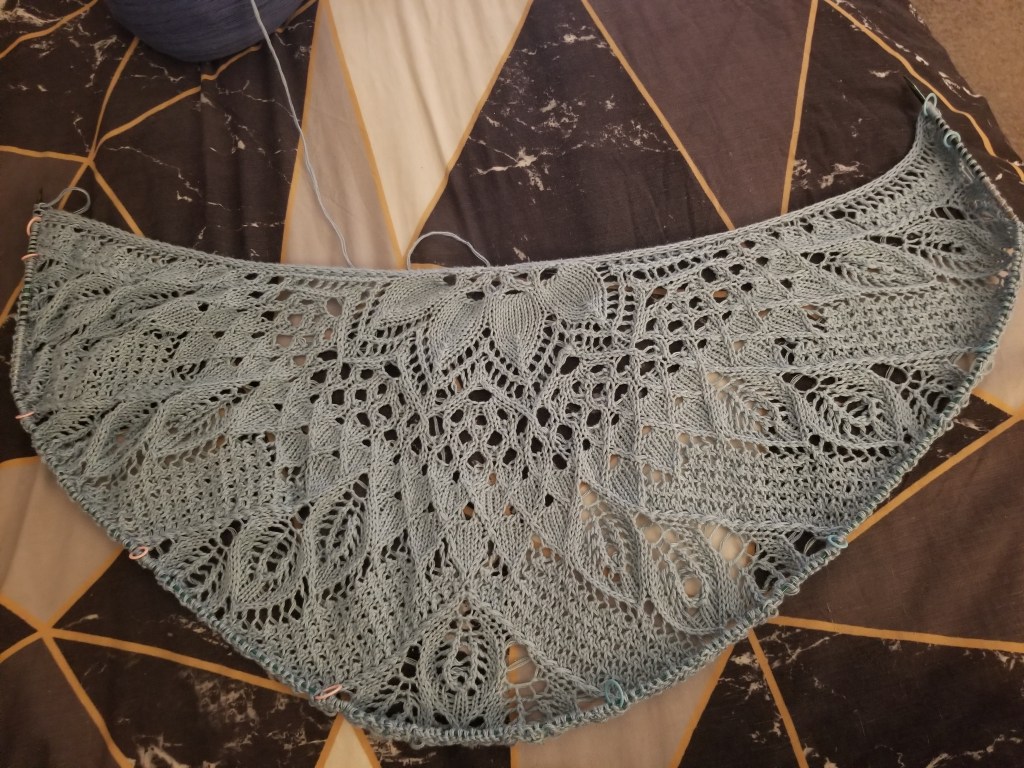
Since my last post about the Wild Swan Shawl, I’ve made a LOT of progress.

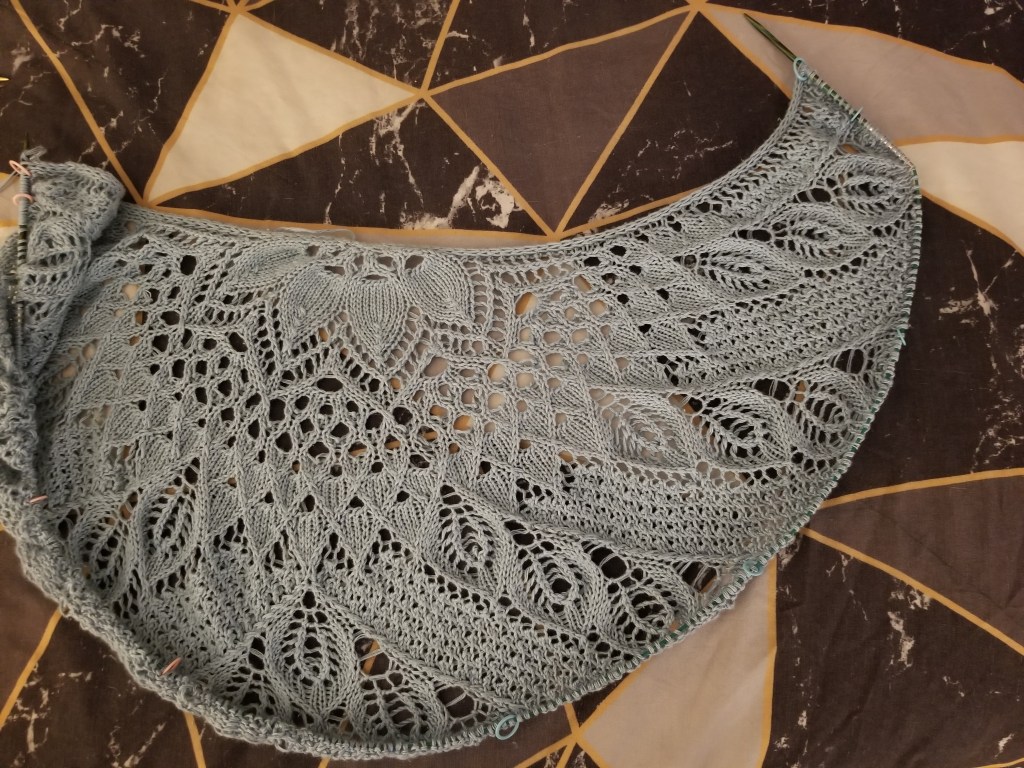
I’m about halfway done with it! (It definitely took some undoing and redoing of rows)

Here are some pictures of the progress along the way:
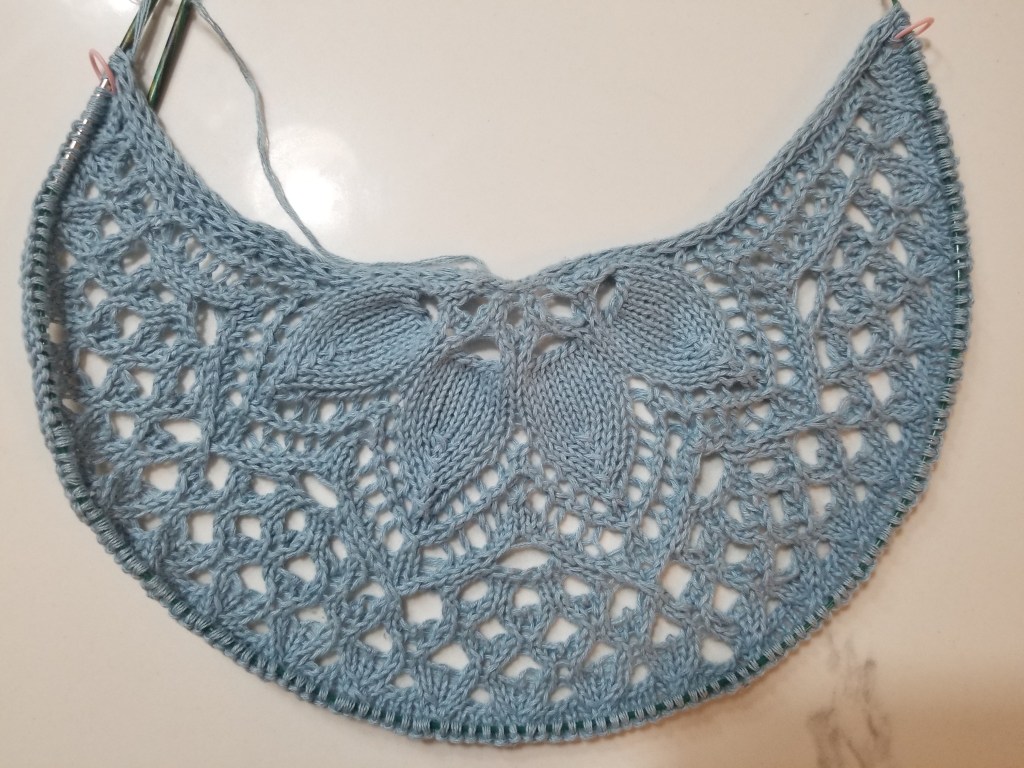
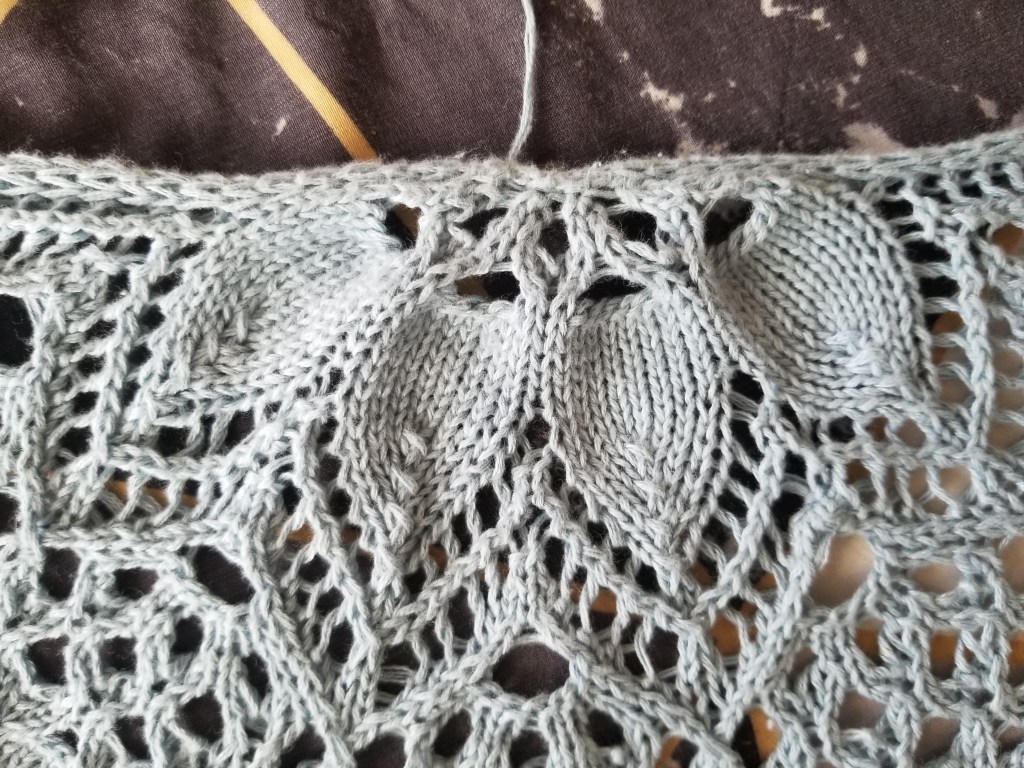
It’s definitely satisfying to see those feather🪶 / leaf🍃 patterns appear after you get past those rows!

The color gradient switching to dark blue hasn’t kicked in yet, but soon!


Some Interesting Stitches

Lace patterns always have some interesting stitch combinations to produce those holey patterns. At the beginning of the PDF for this pattern, there’s a fantastic key explaining some of the stitch notations. Luckily they weren’t too crazy, as they were just extensions of common stitches, but they did take some learning.

Increases and Decreases

Most of these were increases and decreases intended to produce different slants or other visual effects. Lately I’ve been paying more attention to why certain stitches are chosen in a pattern, and specifically I notice the left- vs. right-slanting incs/decs more, now that I’m paying attention.

Here are (most of) the increases/decreases appearing in the pattern:

NotationExplanationCounting EffectVisual Effect
yoYarn-over leading into next stitchIncrease 1 stAdd a new st, with a hole appearing under it
coBackwards loop cast-onIncrease 1 stSimilar to yo, but easier to add many new sts consecutively
kyokk, yo, k into next stIncrease 2 stsIncreases by 2 sts in a fan-like triangle radiating from previous st. Also has a hole appearing in the middle of the fan: \o/
k2togKnit 2 sts togetherDecrease 1 stRight-leaning decrease
skp(sso)Slip 1 knitwise, knit, pass slipped st over knit st Decrease 1 stLeft-leaning decrease
ssk
(not used in pattern)
Slip 2 knitwise (one at a time), then use left needle to knit 2 slipped sts togetherDecrease 1 stSame as skp(sso), but easier for some people
k3togKnit 3 sts togetherDecrease 2 stsVery right-leaning decrease
ssskSlip 3 knitwise (one at a time), then use left needle to knit 3 slipped sts togetherDecrease 2 stsVery left-leaning decrease
sk2pSlip 1 knitwise, k2tog, pass slipped st overDecrease 2 stsDouble central decrease /|\
dcd (?)Slip 2 knitwise, k1, pass 2 slipped sts overDecrease 2 stsDouble central decrease /|\

The specific decreases matter a lot to make the feather patterns turn out correctly. For example, the outer edges of the feathers have to “bend” inwards, like so: /~~~\. After you do a bit of the pattern, you get a hang for when certain sts are meant to be used. Since I was already familiar with the basic k2tog and ssk decreases, it wasn’t too difficult to pick up the 3-to-1 decreases, which just involve more sts being slipped and knit together.

Backwards Loop Cast-On

Although I’d done this st before, I did have to look it up again online to get the hang of it 🤷

I found the picture guide on the Knit Picks website to be super useful here.

Once you figure out the motion to loop the yarn with the thumb and create a new stitch, it goes really quickly.

ONE WARNING:

When you work one of these stitches while passing on the next row, be really sure that you’re counting stitches correctly, because unworking one of these is really difficult. The stitch is usually tight to the needle, so it’s hard to wedge the needle into it to undo it if you make a mistake. Trust me, I had to undo a couple of rows after counting wrong, and it cost me a couple extra days of effort to fix 😭


Feather Pattern Pictures

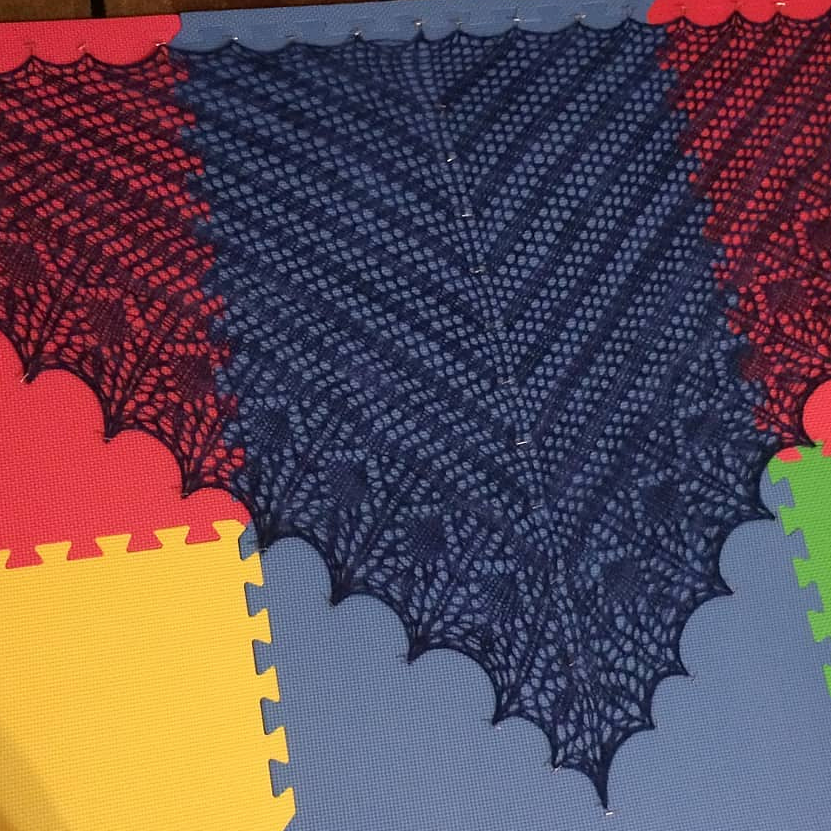
Here are a few more pictures showing some of the patterns more closely:
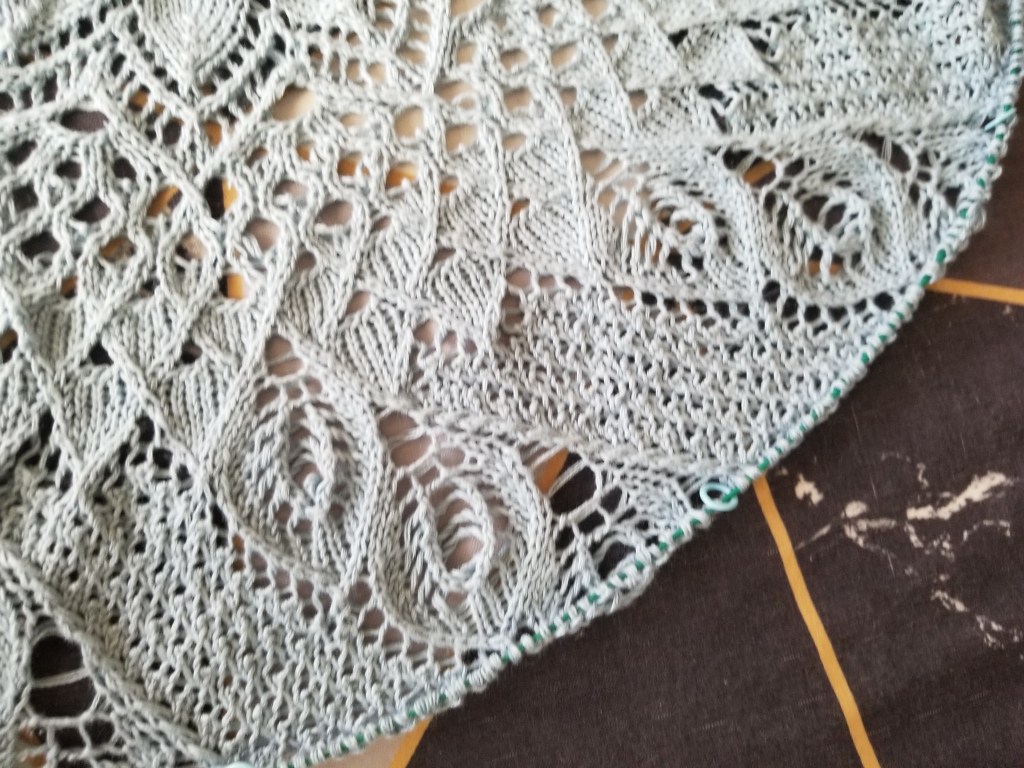

Just one more half left to complete… Wish me luck!
Crafting Projects · Shawls

Swan Shawl [Part 0] – New Project!

I’ve recently picked up a new project!

It’s called the Wild Swan Shawl and the pattern can be found here on Ravelry.

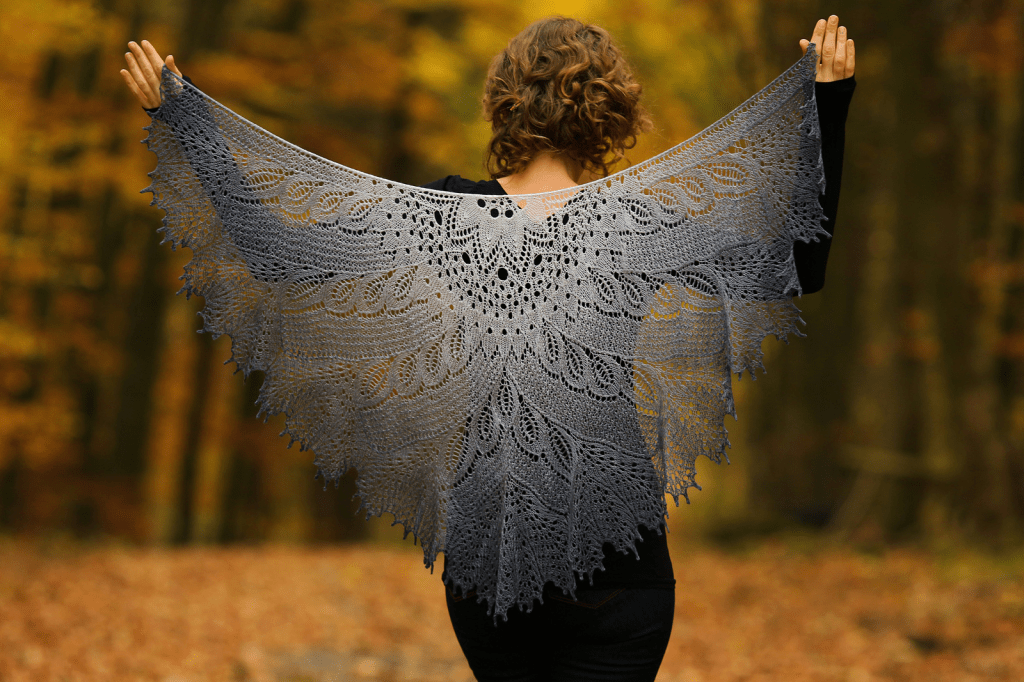
Image taken from pattern page on Ravelry

I’m still working on the Aran sweater, and I have the sleeve, neckband, and seaming left to complete.

For the time-being, I’m putting that aside while I work on the shawl.


Choosing the Pattern

Previous Experience

I’ve only done one shawl before, and you can see the project on Ravelry here.

It was a large (6 ft wide) triangular shawl with a few features:

  • Simple repetitive lace pattern (continual yo, ssk)
  • Scalloped edges with a shell-type pattern, making it look something like bat wings

I really enjoyed that pattern and still count it as one of my best outputs (even though it wasn’t perfect).

This Pattern

For this pattern (as with everything else I pick up), I was looking for some new challenge.

Filtering through some of the patterns on Ravelry, I ended up wanting some of the following:

  • Large crescent- or triangle-shape, rather than entirely circular
  • Visually including some pictorial elements (leaf or feather shapes, etc.)
  • Not overly repetitive
  • Higher difficulty

I landed on the Wild Swan Shawl because it satisfied these needs!

Looking at the pattern PDF, you can see that it’s almost entirely written up using charts, and this makes sense considering the very pictorial nature of the pattern that wouldn’t be capturable with words alone.

I’ve used charts before, but not to this level, so I thought this would be another good challenge.


Choosing the Yarn

Typically, I’m not very adventurous in terms of yarn colors. For the most part, I use solid-color yarns and don’t prefer gradients, speckles, etc. However, this pattern seems to lend itself well to gradients, as it is knit from the center outwards. I asked around my knitting group for gradient yarns, and someone recommended looking at the yarn cakes from Hobbii to find good gradients.

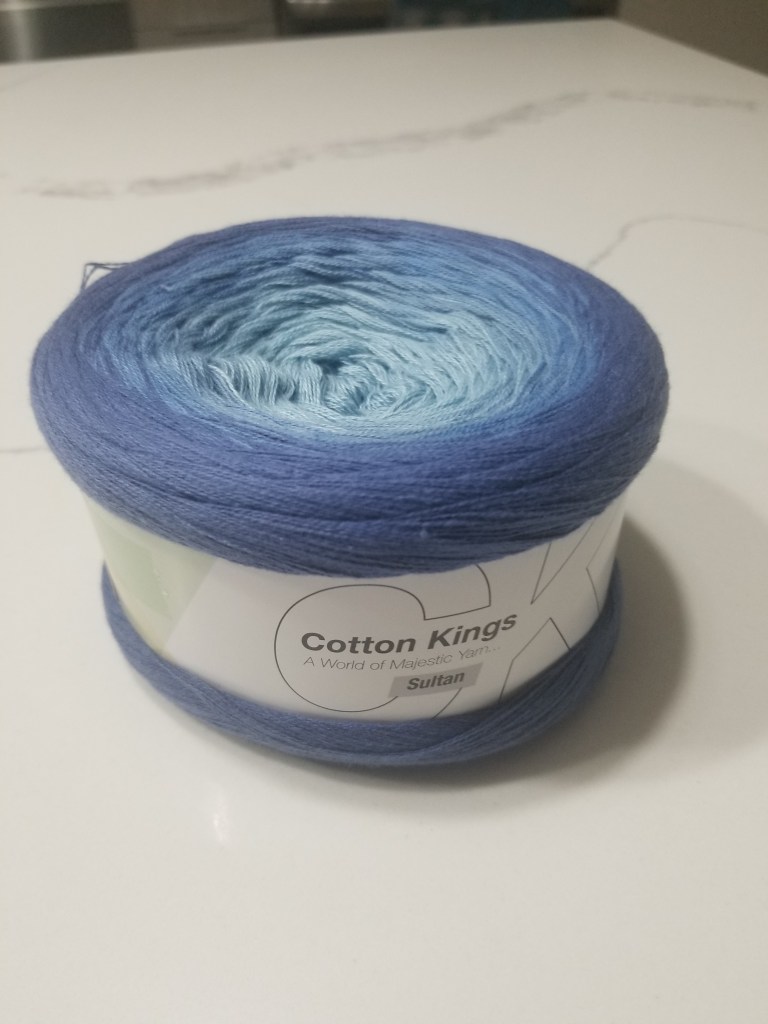
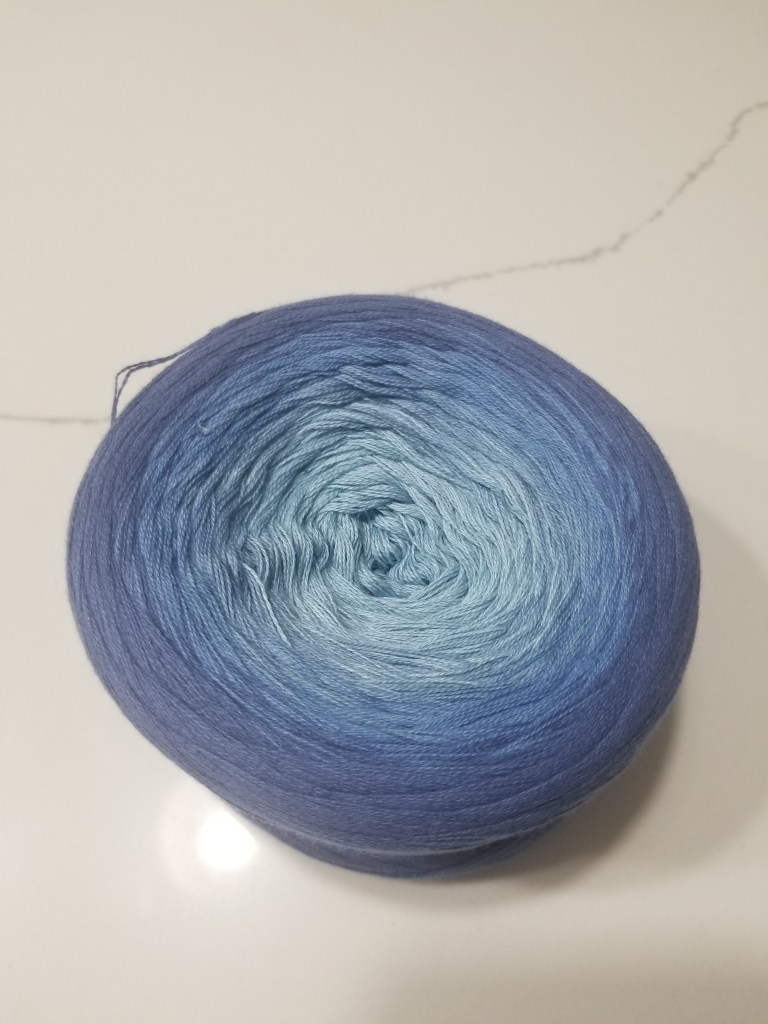
After browsing a bit, I landed on Sultan (Kyanite) by Cotton Kings on Hobbii.

This should give a nice gradient from light periwinkle inside to darker royal blue/purple towards the edges.

Conveniently, this one yarn cake also has the right amount of yardage needed for the shawl, with some leftover.


Let’s Get Started!

The charts in the pattern PDF are a bit intimidating, as they’re very large and don’t seem to repeat much.

Hopefully things will go smoothly once I get into it!

Crafting Projects · Sweaters

Aran Sweater 1 [Part 06] – Sleeve 1

Here’s the latest update on the Aran sweater…

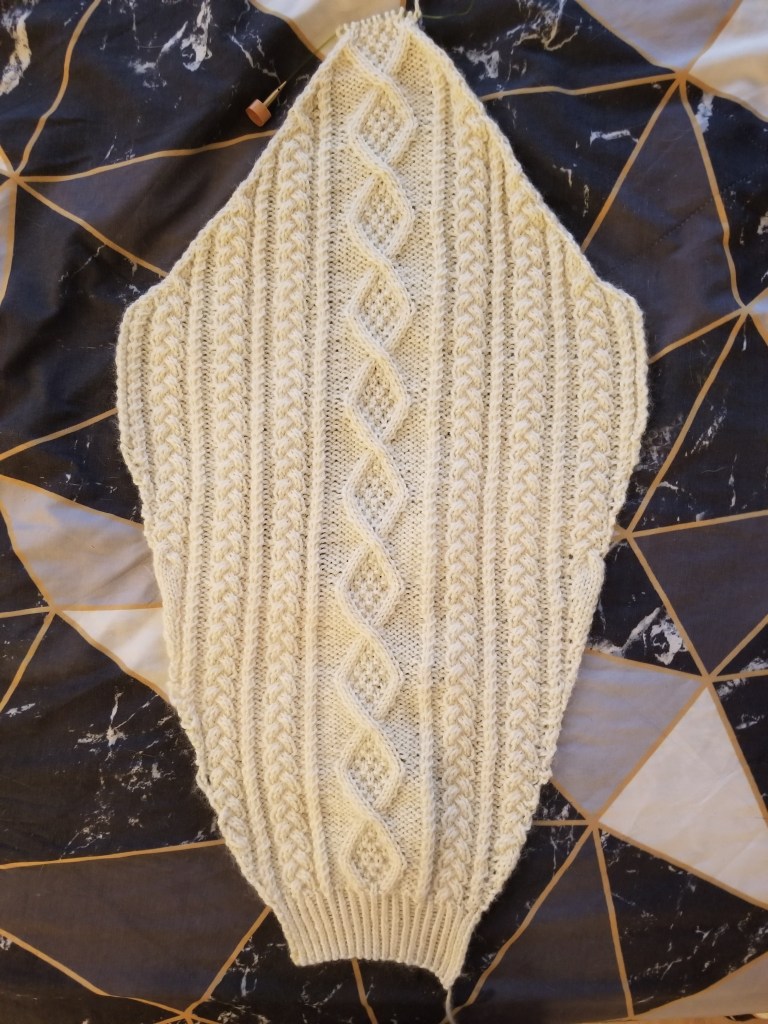
I’ve just completed the first sleeve!


Seems like it came out well!

Just looking at the unattached sleeve, the width and taper come off as a bit questionable to me.

But I figure it’ll make sense once I fit the individual parts together and see how the raglans fit.

Also, this is similar to what the sleeves on my previous cardigan project looked like, so that’s reassuring.


Cables during Increases/Decreases

I did have one issue come up while knitting this sleeve.

The pattern called for increasing and decreasing stitches while maintaining the pattern.

This caused minor conflicts whenever the twist of a cable happened at the same time as an inc/dec.

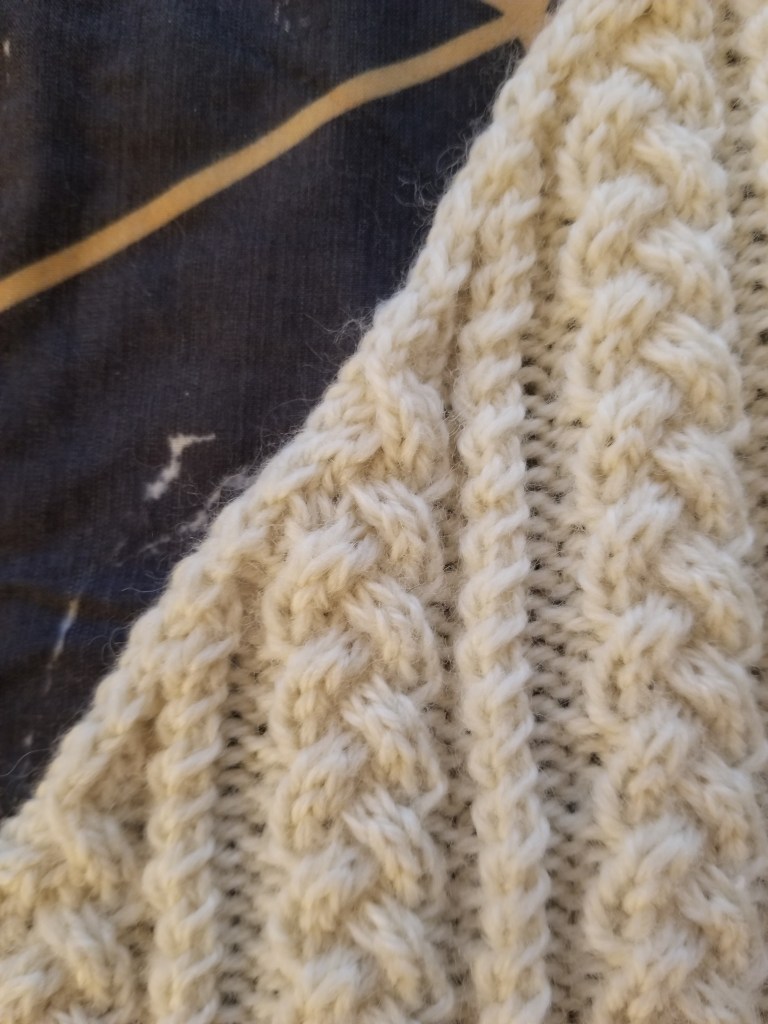
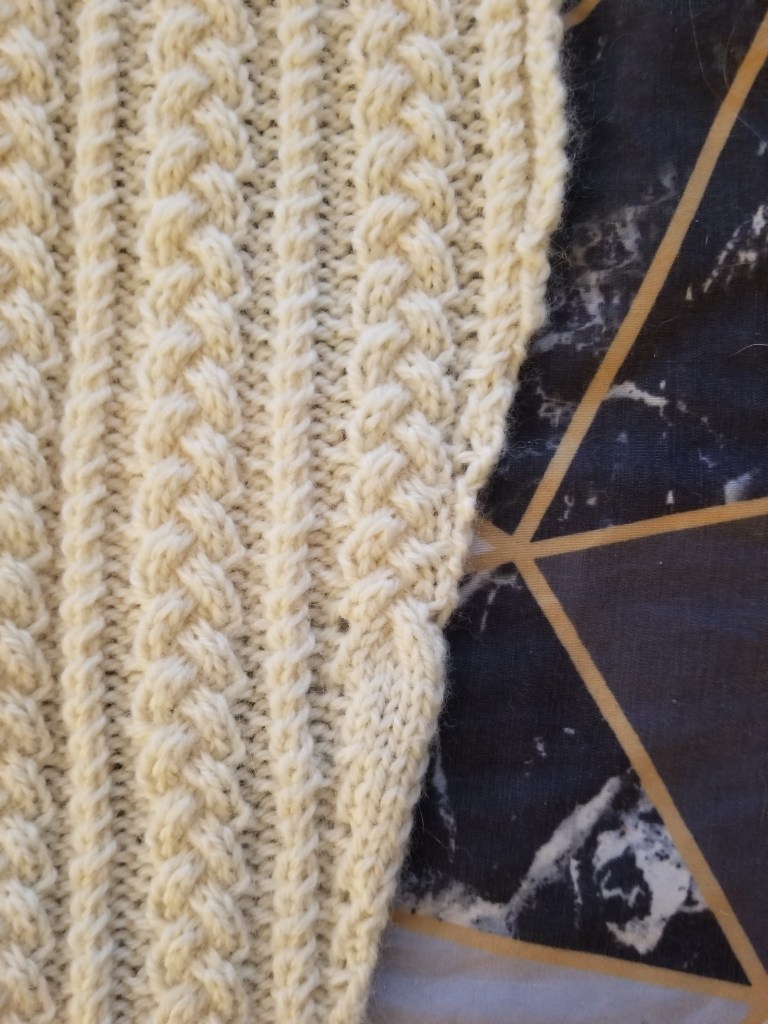
Check out these examples:

On the left, you can see the cable twisting directly into a decrease.

On the right, you can see that the braid couldn’t start until enough of the increased sts were added.

For those situations, I had to decide whether to…

  • Hold off on the cable, so that the inc/dec could happen without complication
  • OR perform the cable twist and ALSO inc/dec (which is a bit finicky to handle simultaneously)

I made those decisions as they arose, and I think it generally turned out fine.


Luckily, these happen at the inner seam of the sleeve, which means they won’t be very visible.

Anyway, the seaming will eat up a bit of the width, as the edges will get curled in.

That will hopefully help hide those confusion spots 🤷‍♂️


The last piece is the other sleeve, which should be similarly easy.

What I’m reeeeeally dreading is seaming the pieces together 😒 (my least favorite part of any project).

Crafting Projects · Sweaters

Aran Sweater 1 [Part 05] – Front Piece

Another update on the Aran sweater…

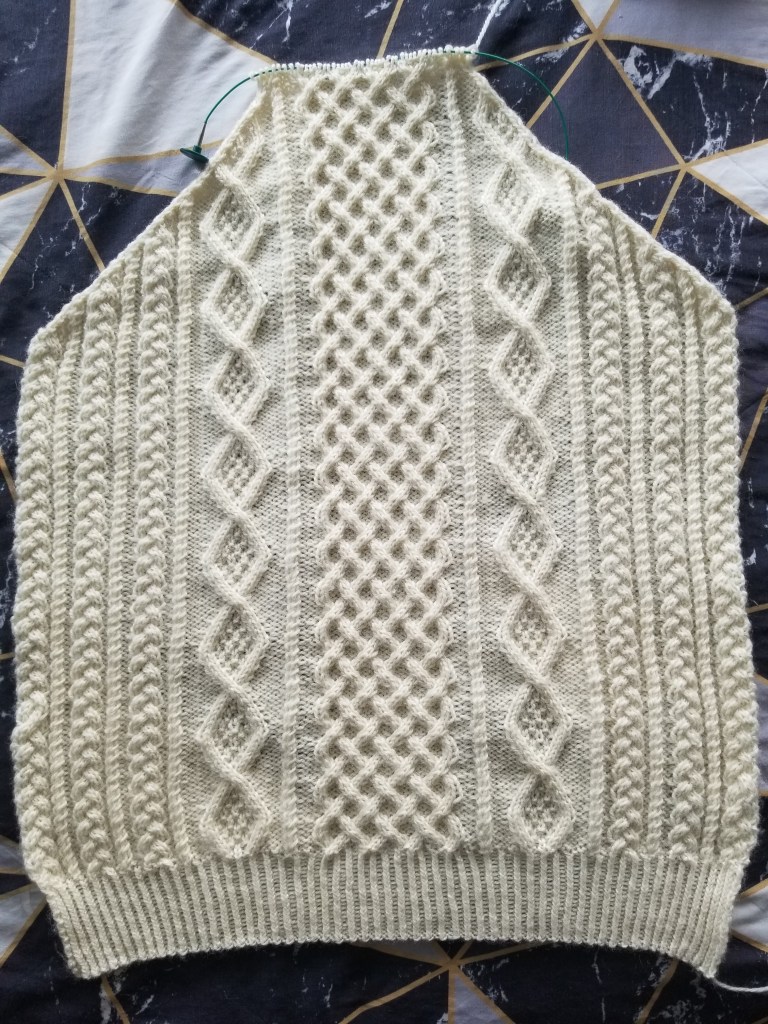
In addition to the back piece, I’ve now completed the front piece!


Initially, I was working 4 rows per day, which was about 1/2 of an inch per day, but that felt too slow, so I doubled the pace!

I had one mishap in the middle panel where the yarn broke and unraveled a bit, but I managed to salvage it and tie it up before any serious damage happened. Luckily it affected one of the behind cables in a cable-cross, so the issue is obscured a bit by the front cable of the pair.

Hopefully no more unraveling happens in the future though 🤞


Next up are the sleeves!

Pattern Design · Simple Chevron Cowl

Design #1: Simple Chevron Cowl (Idea)

Today, I announce my first venture into the world of design!

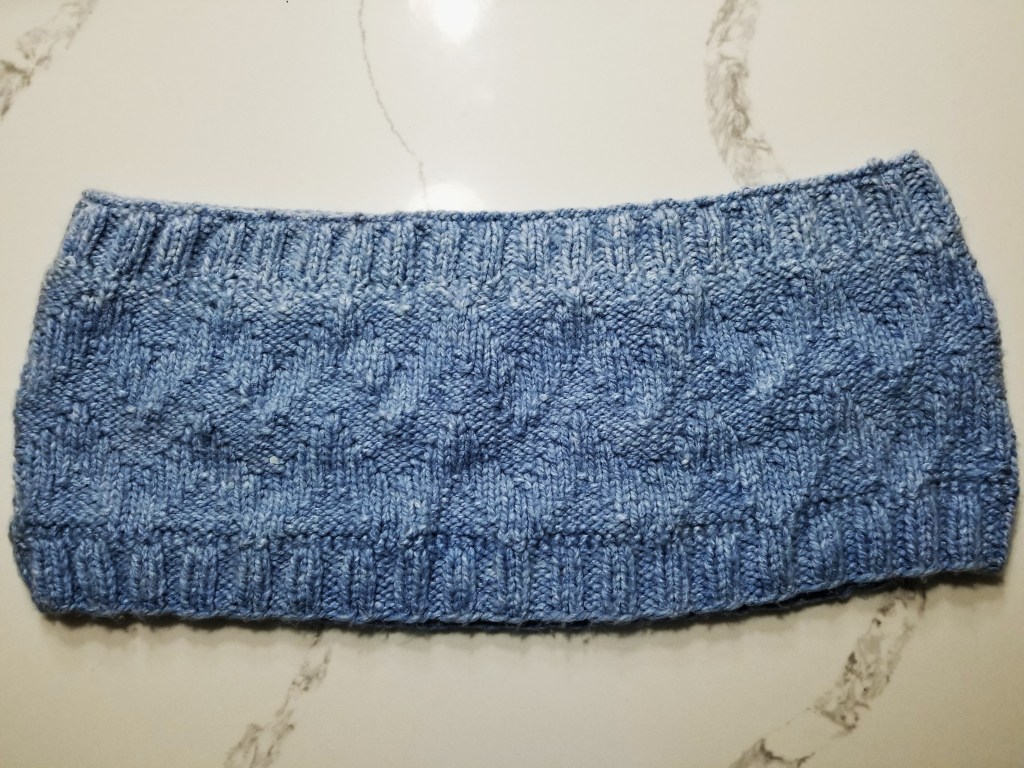
Behold: The Simple Chevron Cowl !! 😮

It’s a circular cowl which has a reversible chevron pattern and ribbed borders.

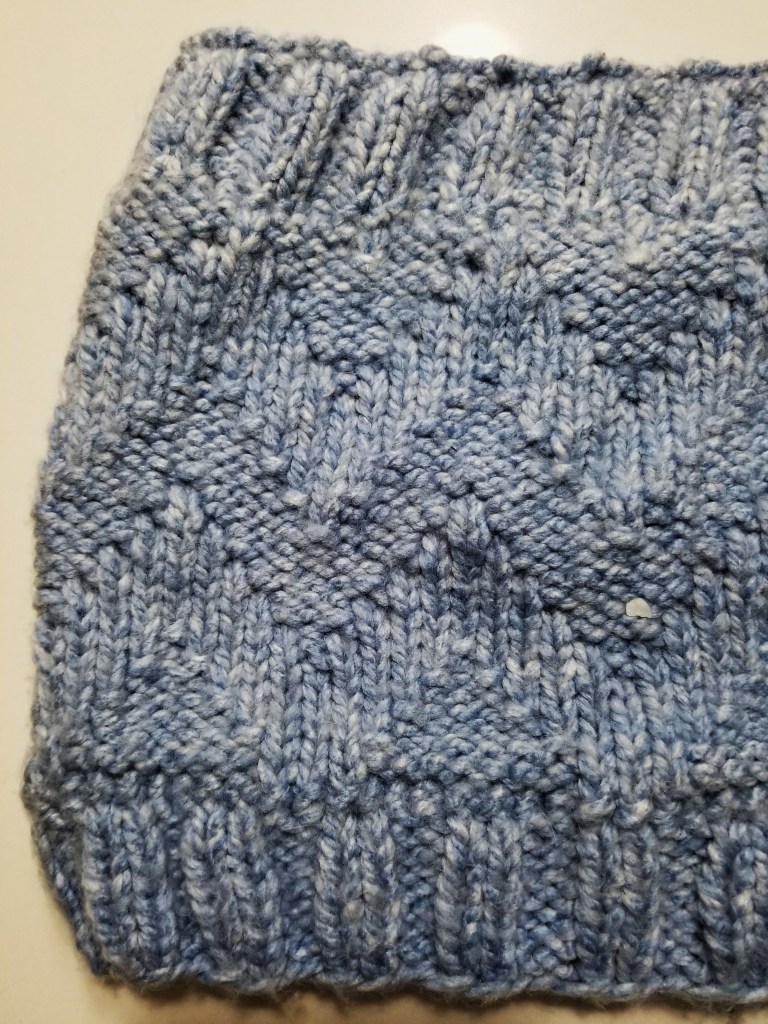
Here’s a close-up of the internal chevron pattern:


Getting into Pattern Design

I’ve wanted to design my own patterns for a long time, and today I’m finally forcing myself to start somewhere.

However, writing a design seems like a much more intense process than simply following one.

There are so many considerations that I can think of, just off the top of my head:

  • Yarn (e.g. brand, weight, material)
  • Needles (e.g. straight vs. circular, size)
  • Sizing (e.g. gauge, dimensions, parallel size instructions for XS/S/M/L/XL)
  • Techniques used in pattern (e.g. specific incs/decs, cables, colorwork)
  • Visual Readability of pattern (e.g. pictures, text/visual formatting, charts)
  • Ease of Understanding for reader (e.g. st abbrs +key, written explanations of uncommon sts)
  • Accessibility for low-vision and screen reader use

I’ll definitely have to explore these individually and learn as I go.

Found some good resources to start with:

It might be worth buying one of these books if I’m planning to design more in the future 🤔


Rough Idea for Pattern

  • Materials:
  • Instructions:
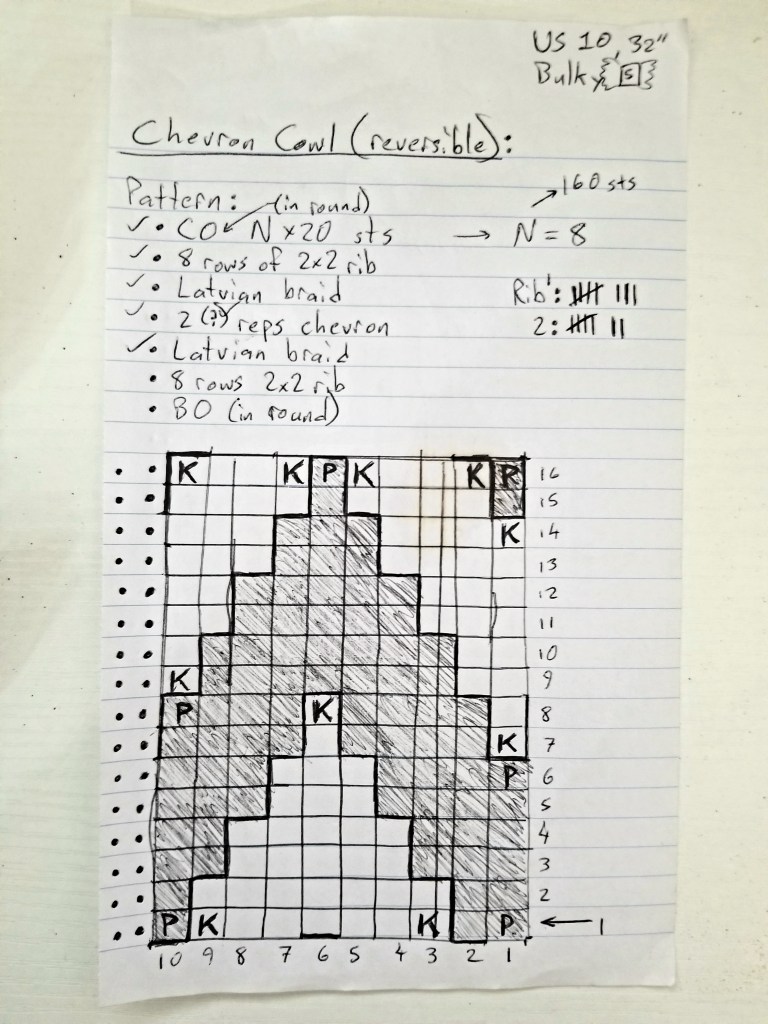
    • In the round, CO N×20 sts (in my test cowl, N = 8)
      • Join in the round
      • Place marker
    • 8 rows of 2×2 ribbing
    • Latvian (horizontal) braid
    • Chevron pattern (repeat for desired number of rows)
    • Latvian (horizontal) braid
    • 8 rows of 2×2 ribbing
    • BO all sts in the round
    • Seam in ends

Here’s my hand-written rough design:

The chevron pattern is pretty simple as it’s composed of only K and P sts, and repeats smoothly.

Initially I went with a basketweave pattern, but that didn’t work on WS as it isn’t reversible

The one difficult part is the horizontal braid, so I’ll probably have to include my own instructions about how to do that, plus an option for the reader to omit it or replace it with something simpler.

Also, I’m not sure of the best way to make the chart (apart from manually in a spreadsheet).


Next Steps

The pattern itself is mostly done, so the main hurdle is writing up the pattern and testing it.

I’ll consult those online/written resources and get ideas from other online patterns.

Once I’m done with this first pattern, I’ll post it for free here and on Ravelry.

Eventually I might sell patterns, but I’ll wait until I actually know what I’m doing before asking for money 😅

Wish me luck!

Crafting Projects · Sweaters

Aran Sweater 1 [Part 03] – Mistake 😞

Progress update on the sweater:

So far it looks pretty good!

I’ve been keeping a pace of 4 rows 2/3” per day.

Just need to continue another ~6 inches in this pattern, and then the raglan shaping will start.


BUT… can you spot the mistake? 🤔

Look along the braid on the left edge:

I must have been working the cable absent-mindedly and cabled towards the back instead of front.

Ugh 😓 I hate when this happens!

I would have just frogged it so I could redo it from there, but I was already a bunch of rows ahead of it.


Usually I’m a perfectionist about things like this, but I’m just gonna leave it in.

It’s not a huge deal anyway since the sweater is for myself.

Plus since it’s at the side of the piece, it won’t be as noticeable as if it were in the center of the piece.

People don’t usually notice cable mistakes when there’s LOTS of cabling going on, especially near the seams.

Anyway 🙄 … to be continued

Crafting Projects · Sweaters

Aran Sweater 1 [Part 02] – Cable Panels

In my last post, I’d started off the back piece of the sweater with a twisted rib, ending with increases interspersed throughout the final WS row of the ribbing.

Now we’re getting into the fun part! ~~> Those delicious CABLE panels 🧶


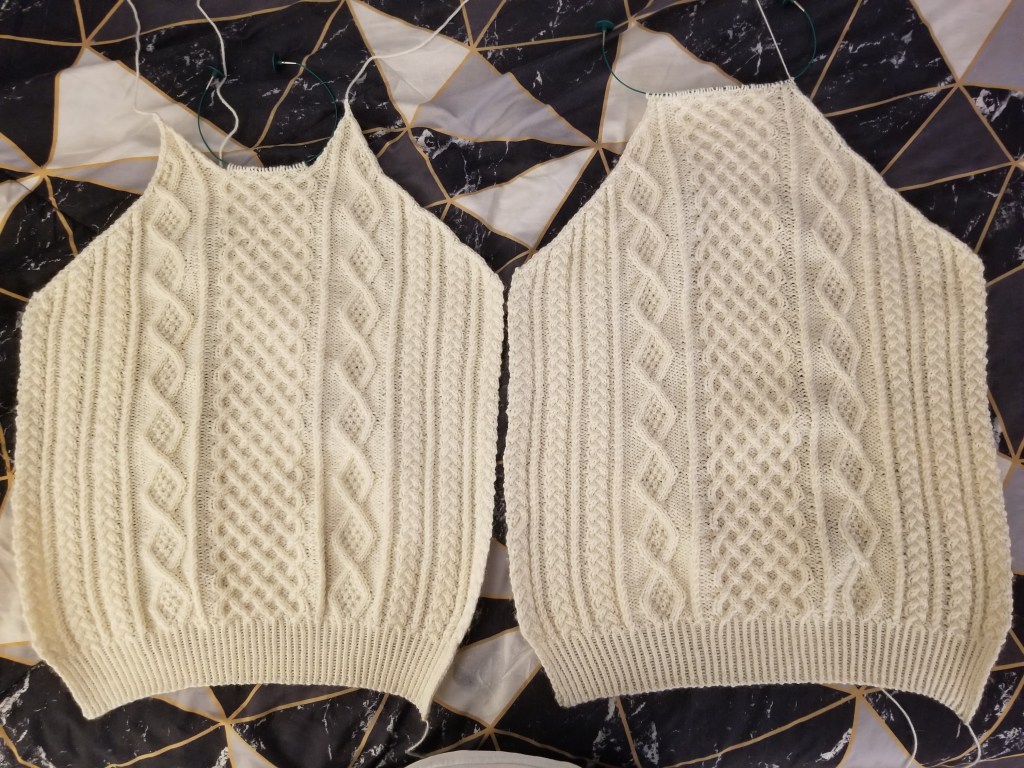
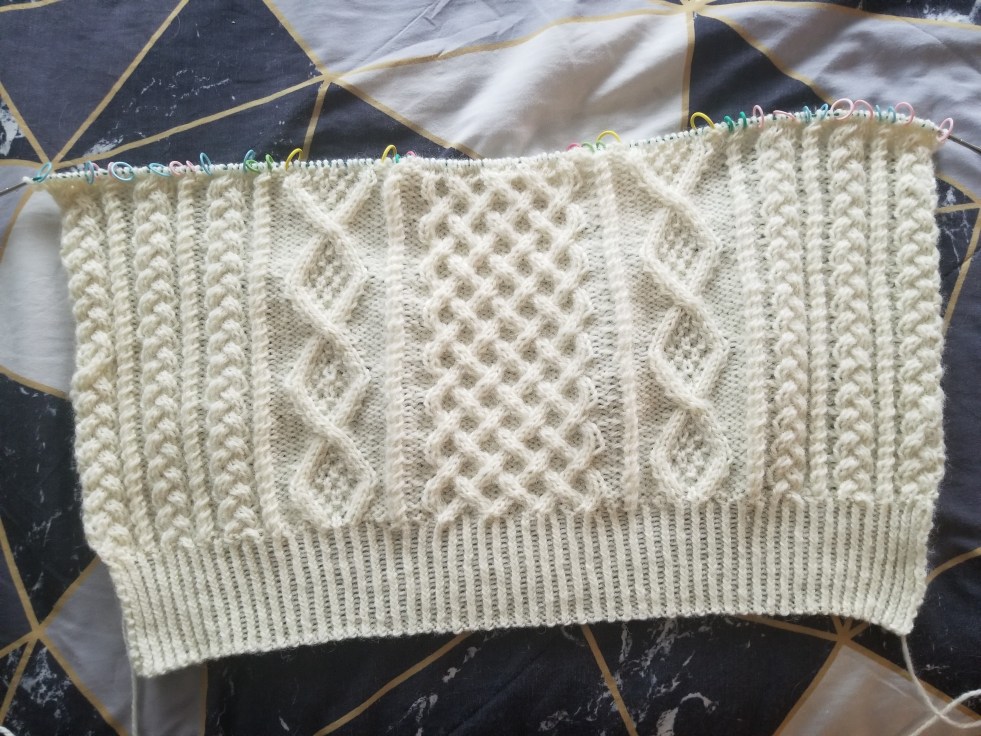
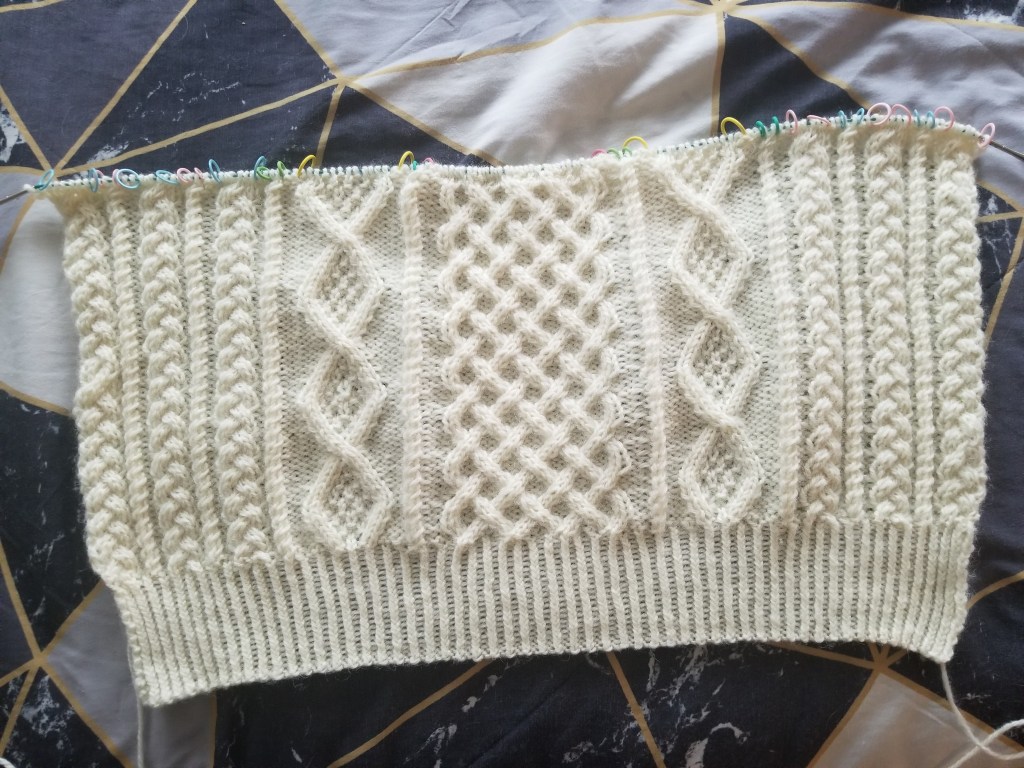
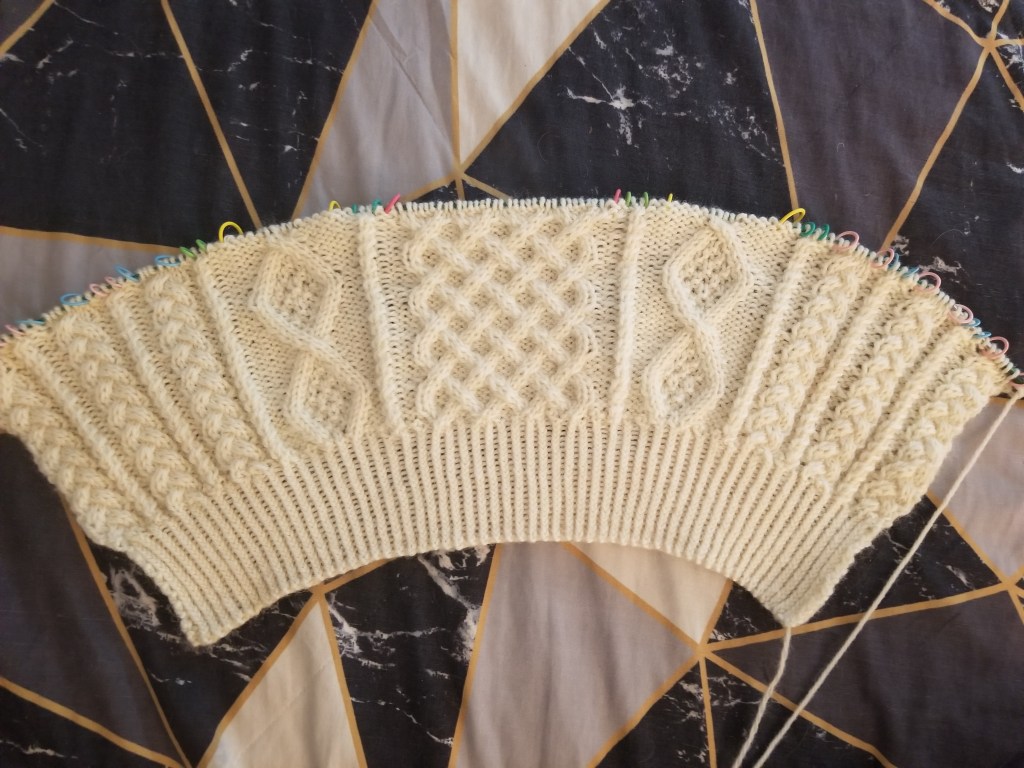
Here’s where I’m at so far:

My tension at the cabled sections was initially unstable, but it evened out once the pattern was established.

The cables are looking pretty clean, if I do say so myself!

I’m only about a third of the way through this stage of the pattern. Since the row-counts for the 3 cabled sections are 4, 8, and 18, the panels do match up nicely on multiples of 4, even though the 18 messes that up. I’ve just been keeping track of rows in a notebook so I don’t get mixed up. Plus I’ll definitely want to have the same row-count for the front piece, so good I’m keeping track.

Luckily it has been easy to go into auto-pilot once the pattern for the cable panels was established. This portion of the sweater continues like this until the point where the raglan sleeves would be joined in. After that, the pattern is continued, but worked with decreases at the sides for the sleeves.


Minor Cable Issues

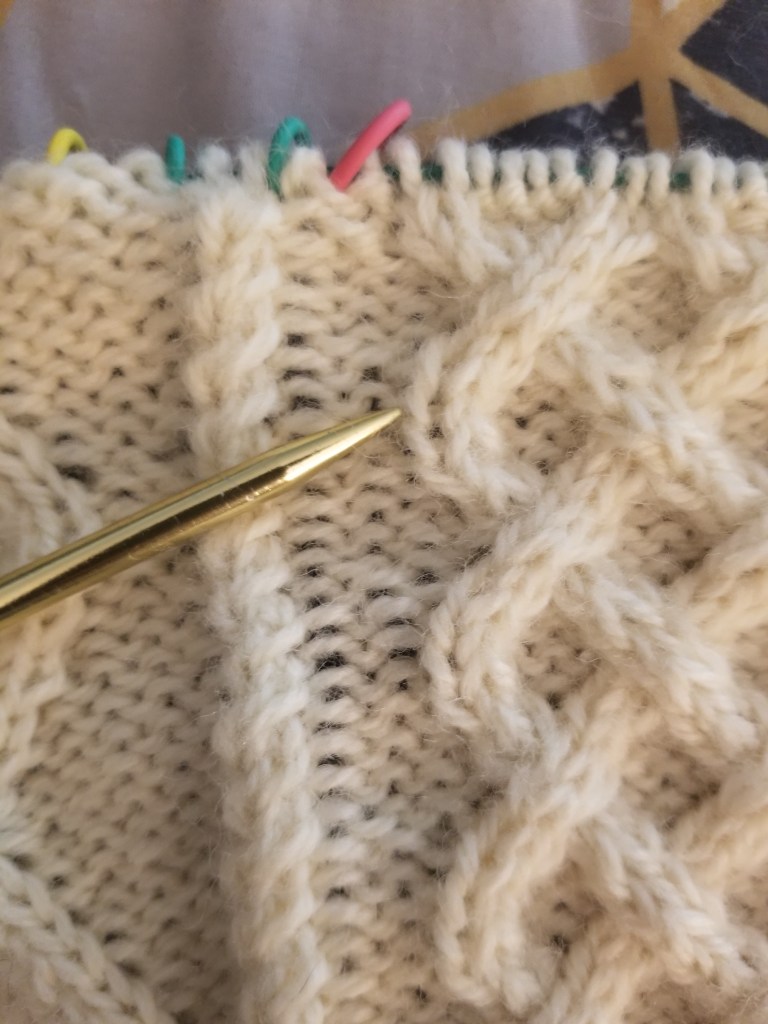
I’ve noticed a few places where the cables look a little bit messy.

The boundary K st of a cable will sometimes be loose because of the P st before or after it:

This seems to mostly happen at the outermost st of a cabled panel, rather than the internal ones.

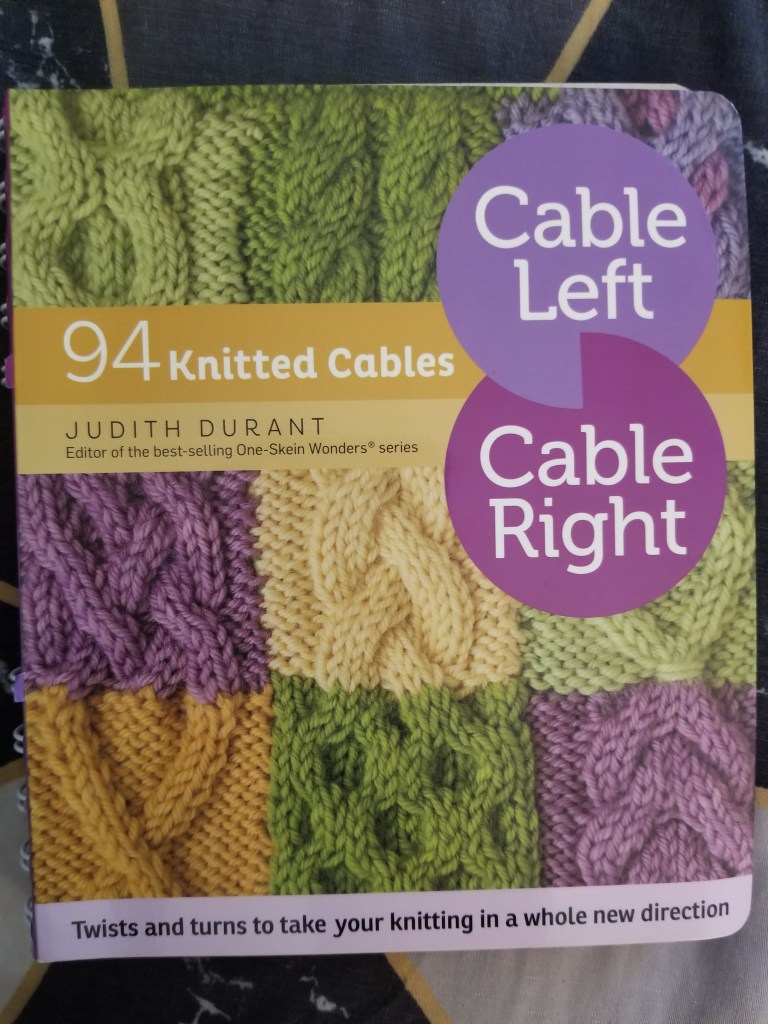
I remembered reading about a tip for this specific situation in this book by Judith Durant:

She suggested two possible fixes:

  • Use a bit more tension on those boundary sts, to counter the loosening between K/P sts
  • Purl the subsequent P st tbl to twist it and add some tightness

I’m trying out the second option since it has worked for me in the past, and it’s a more concrete fix than adjusting tension, which can be wishy-washy.


I typically don’t prefer to make tension changes when I’m midway through a pattern, but I don’t think anyone (except for me) will really notice such a small change, especially after washing and blocking everything out.

At least it’ll be a good test!

I’ll figure out whether that improves the appearance of the cables and reduces looseness.

Crafting Projects · Sweaters

Aran Sweater 1 [Part 01] – Twisted Rib

Finally got started on the project!

First up is the back piece section of the sweater, so let me record some notes on my progress here.


Twisted Rib

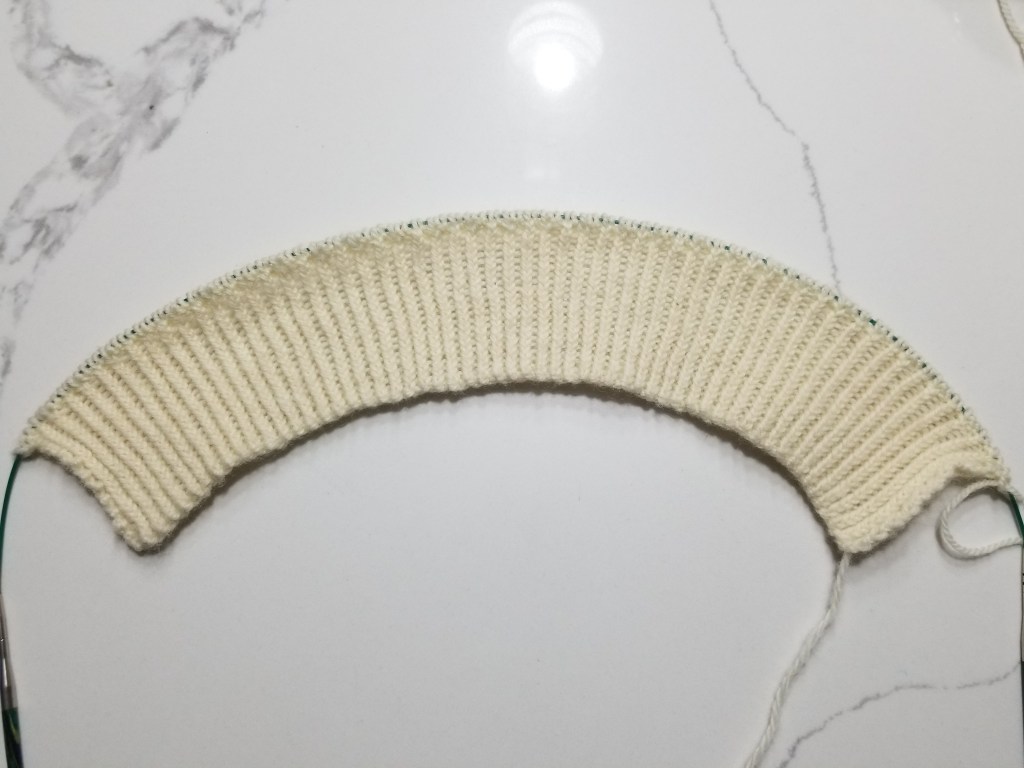
The section starts with a simple twisted rib (w/ the smaller needles) for the bottom boundary of the sweater:

This stitch pattern is super easy as it’s just like the normal 1×1 ribbing, done by alternating between K (knit) and P (purl) for RS (right side). The “twisted” part comes from working the K’s tbl (through the back loop), forcing those stitches to twist, making the stitches tighter and the resultant ribbing lines thinner as well. Then on the way back on WS (wrong side), just K the K’s and P the P’s as usual, but working the P’s tbl.

The stitch pattern is the following 2 rows alternated (odd number of sts):

  • Row 1 (RS): *k1 tbl, p1, rep from * to last st. k1 tbl
  • Row 2 (WS): *p1 tbl, k1, rep from * to last st. p1 tbl

Sadly, ribbing always reminds me of my sad life circumstance as a western throwing knitter because of all the extra hand motions just to switch the yarn between front and back 😞.


Last Row Increase

On the last row of the twisted ribbing, the pattern calls for an evenly spaced increase of 29 sts interspersed among the existing 115 sts. Then we switch to the larger needles for the rest of the piece.

I’ve done plenty of increases before, but I know that the specific increase that I choose might leave eyelets or holes which would look bad on the final product. So I took the opportunity to sit down and look into different kinds of increases and learn the pros and cons for each.

I read through this guide from Nimble Needles, and I would HIGHLY recommend that anyone else refer to this page to learn about different kinds of increases.

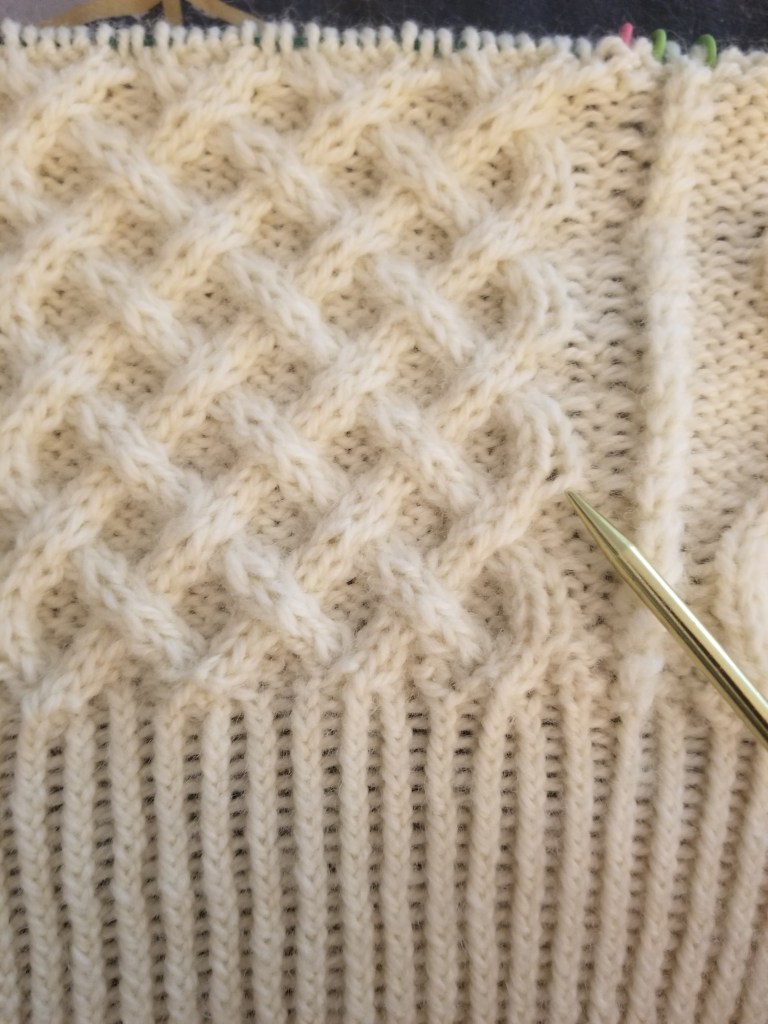
Here’s what the piece looked like after knitting a bit past the increase row:

Look between the ribbing and the cable section… the increase is SO INVISIBLE 🤩

The increase that I went with was a KLL (knit left loop) increase to make it as invisible as possible. Check this tutorial from the previous site for a tutorial. This was definitely better than increasing by knitting the same stitch twice, using a yarn-over, picking up the strand in-between, or casting on mid-row. Those would all leave some noticeable amount of hole or gap.


What’s Next?

Next up is the main section of the back piece, which is pretty much just a ton of cables (my favorite!!)